That's right I know how to use & own power tools! I am so excited about my new hobby! My first project, a work bench. I couldn't sit on the floor every time I needed to use my saw! Ana White is such an inspiration to me! She helped me realize that I can build furniture, just like she does! She has so much information on her blog & I also purchased her book, Handbuilt Home. To view Ana's website click
HERE.
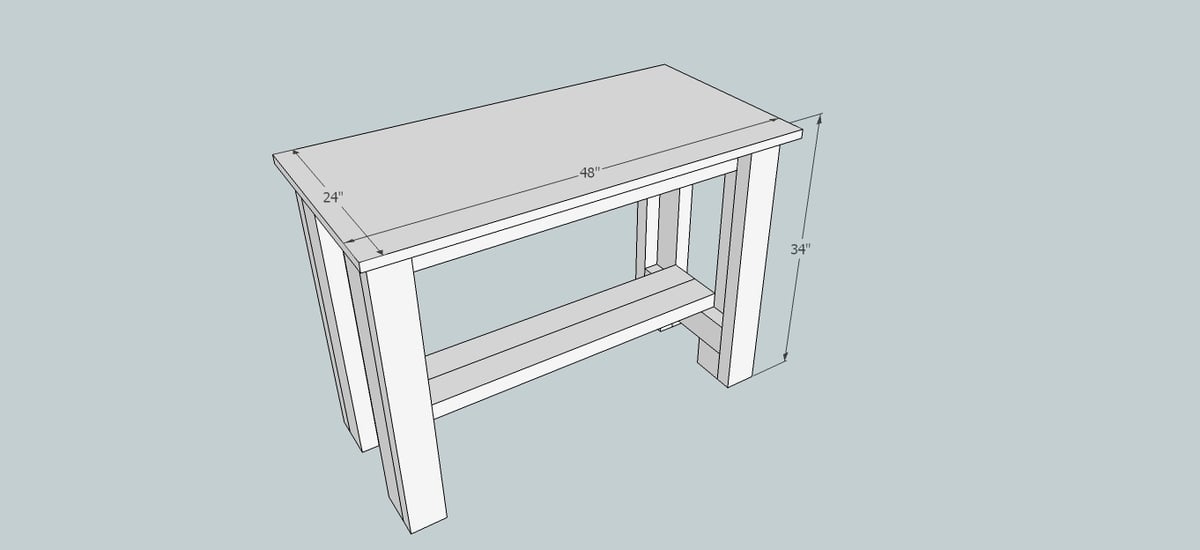
I made the top surface of the bench with 2 x 6's instead of a sheet of plywood, because I don't have a circular saw yet, & I would not recommend it because its a little bit wonky. This was my first project & I had not figured out to use my Kreg Jig yet.
A helpful tip I would not cut the 12" pieces of the supports for the top first thing, wait to make those cuts until after you get the base together. I learned that 2x4s are not really 2" by 4", they are just short of that. I also added 2 more 2x4s on the bottom shelf to make it wider. Its definitely a very heavy & sturdy work bench, & if I ever need to move it that is what my husband is for! No more sitting on the floor to make cuts with my miter saw! Happy Building!
Materials and Tools
Shopping List:
9 - 2"x4"x8' (about $2 a stick)
1 - 24"x48"x1" laminated pine board from the Home Depot (about $20)
2 1/2 inch screws
wood filler
120 grit sandpaper
wood conditioner
paint brush
Tools:
measuring tape
pencil
drill
circular saw
countersink drill bit
Cut List
8 - 2x4 @ 33"
4 - 2x4 @ 3"
2 - 2x4 @ 16
4 - 2x4 @ 40
4 - 2x4 @ 12
Cutting Instructions:
All of the cuts I've described use true-measurement 2x4s. If you purchase 2x4s that are in fact only 1.75"x3.75", the cut list will still work, but your base will contract by an inch in each direction. I've listed all the cuts as being made by a circular-saw. In fact, I used a miter saw and, if you prefer, you could use a simple chop-saw as well.
General Instructions
Please read through the entire plan and all comments before beginning this project. It is also advisable to review the Getting Started Section. Take all necessary precautions to build safely and smartly. Work on a clean level surface, free of imperfections or debris. Always use straight boards. Check for square after each step. Always predrill holes before attaching with screws. Use glue with finish nails for a stronger hold. Wipe excess glue off bare wood for stained projects, as dried glue will not take stain. Be safe, have fun, and ask for help if you need it. Good luck!
Step 1
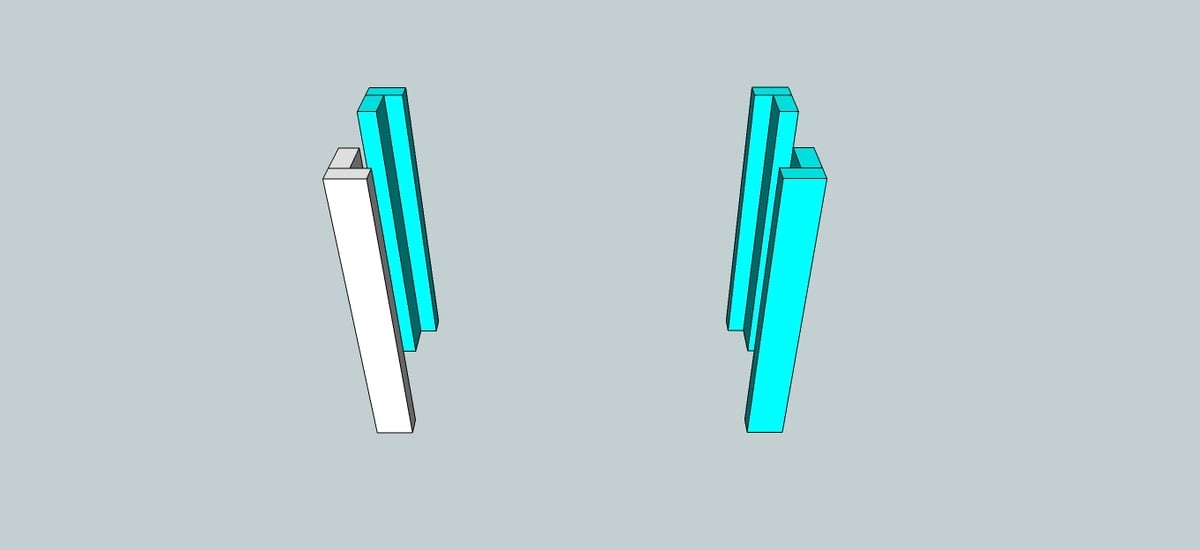
First, cut two 2x4s to length (I picked 33 inches). Fasten them together at a ninety-degree angle (I used three equally spaced 2.5 inch construction screws).
Step 2
Lather, rinse, repeat: you need three more legs to build the bench.
Step 3
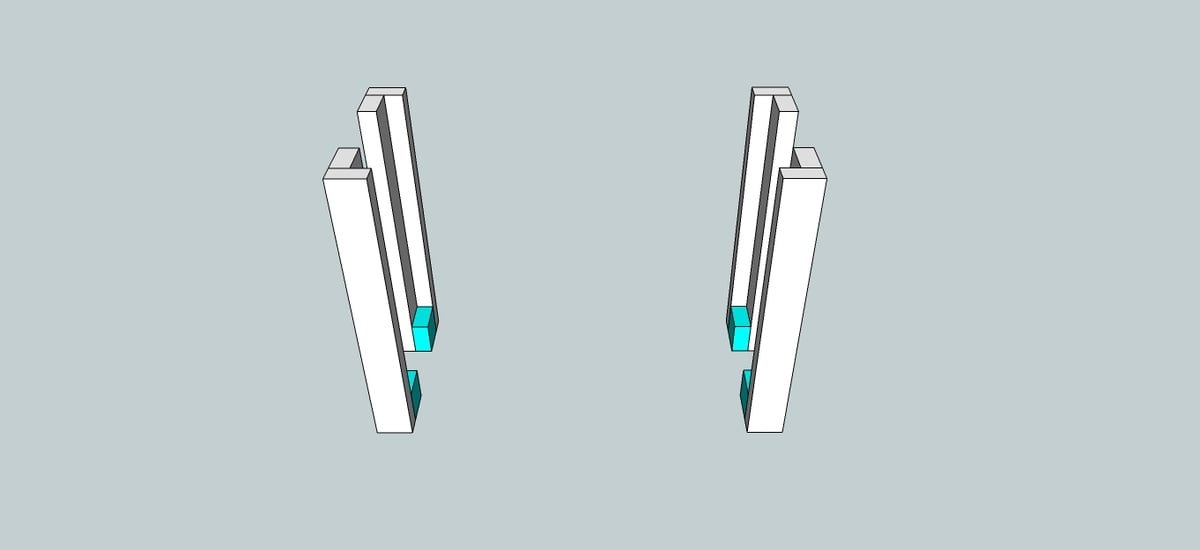
Next, cut a 2x4 into four sections, each three inches in length. Secure them to the bottoms of the legs using two construction fasteners to keep them in place.
If you'd like, you can skip this step. I find, though, that adding cleats to the bottom of the legs is helpful for three reasons: (1) because it's easy to make sure every cleat is the same size, it makes leveling the stretchers easy; (2) they support the stretchers better than screws would by themselves, and (3) they add surface area to the feet of the legs, which makes the whole project sturdier.
Step 4
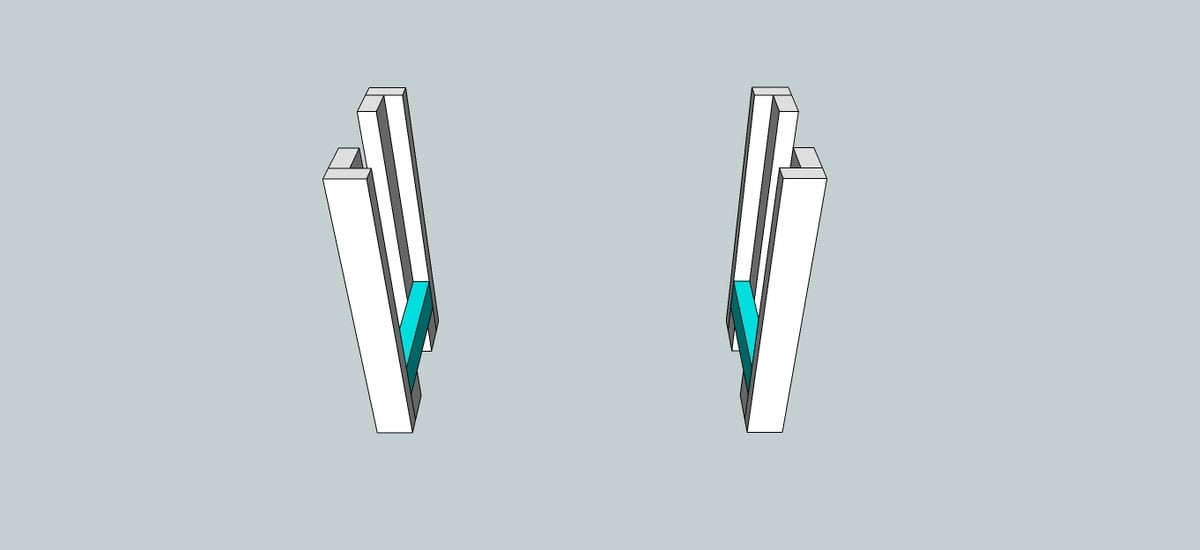
Now it's time to add shelf supports. The length of your shelf supports will determine the width of your project, so consider how long you want them to be.
I knew that I would be using a 24"x48" top, and wanted a two-inch overhang on the front and back so, subtracting four inches for the legs, I cut my shelf supports to 16-inches each.
Step 5
Now it's time to add the shelves. These will determine the length of your project so, again, consider how long you want them to be.
I knew that I would be using a 24"x48" top, and wanted a two-inch overhang on the sides so, subtracting four inches for the legs, I cut my shelf supports to 40-inches each.
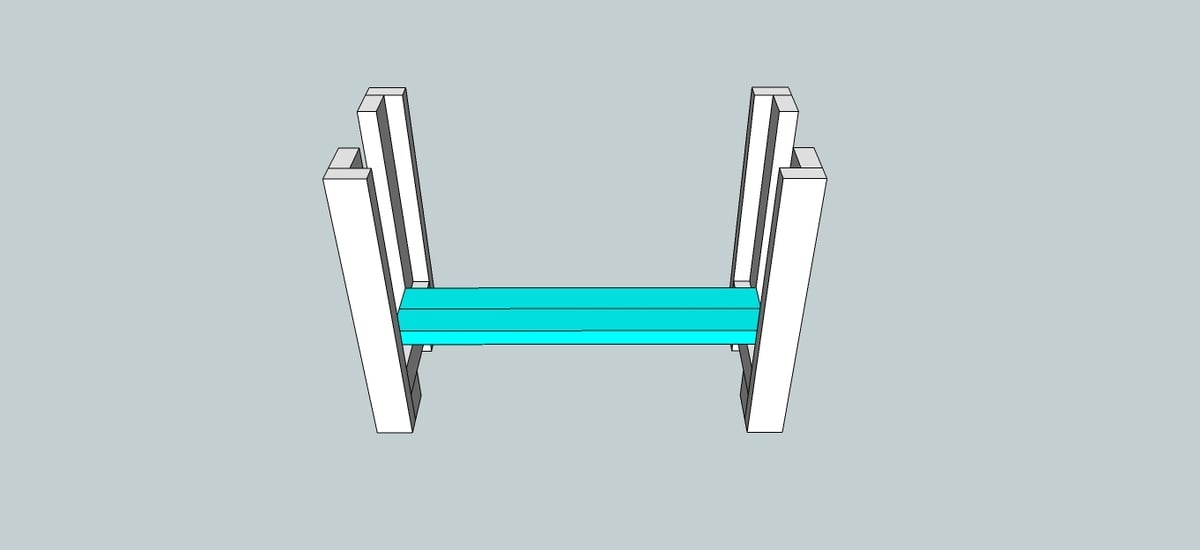
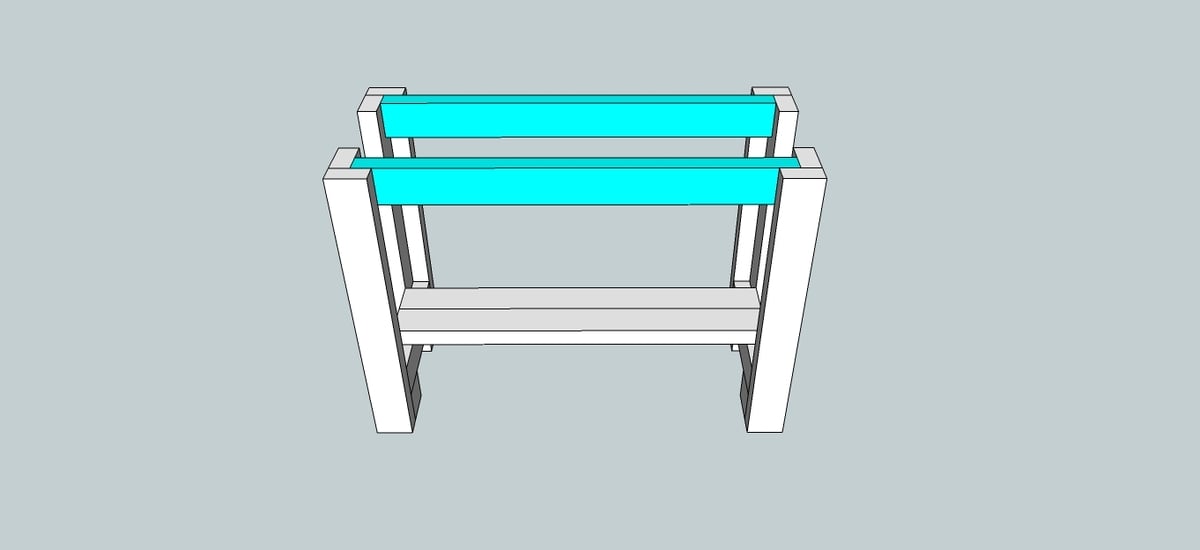
Step 6
Next, cut stretchers to the same length as you chose for the shelves, and fasten them to the top of the legs.
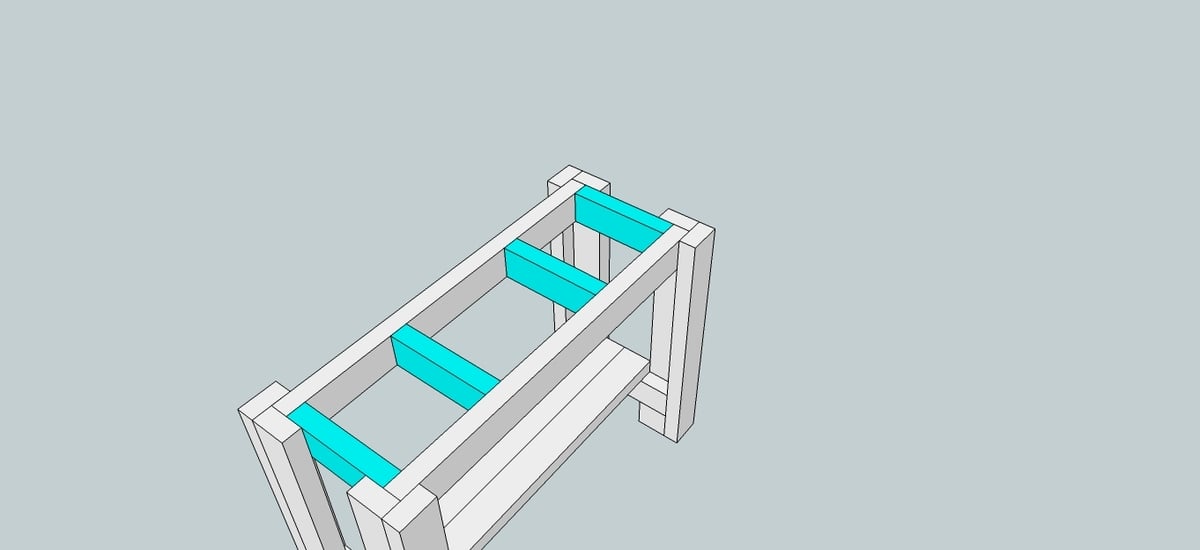
Step 7
Now add supports for the top. These should be four inches shorter than the shelf supports you originally cut so, in my case, 12 inches each. I've found, thus far, that four were sufficient to keep my pretty flimsy top secure but, depending on the material you use, you might prefer more (or less).
Space them evenly, and secure with two screws..
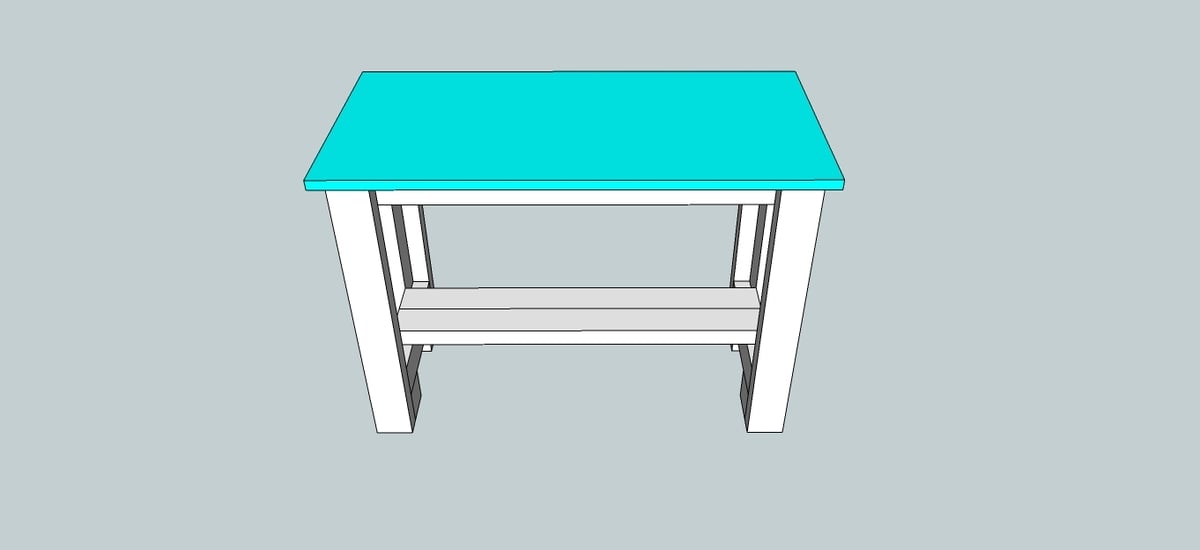
Step 8
I added a 24"x48" top made out of laminated pine 1x2s from the Home Depot. They're cheap and, after I varnished it, reasonably hard. I was also in a bit of a hurry to get the project done, so speed and ease of construction were issues for me. I joined the top to the stretchers and supports with counter-sunk screws that I filled with wood-putty and sanded flush.
If you'd prefer, you can build a top yourself, in any of a number of ways. I considered using 2x4s joined to one another, but was concerned that the grooves would trap nails and saw-dust.
Another idea would be to stack three pieces of plywood on top of one another, cut to size. That would provide strength and durability that my flimsy one-inch top will ultimately lack.
PLANS PROVIDED BY :
Ana White