Search This Blog

Sunday, June 8, 2014

Toy box on casters

I didn't have a build plan for this one.  I just used some of my scrap wood to design this!  I used 1x12 cut at 15" for the sides & then I cut 1x3's to the length I wanted (32").  For the bottom I used 3-  1x4's.  This won't be able to hold small toys, but I wanted to use up what wood I already had!  The handles I purchased at hobby lobby & the casters I found at Lowes.  The stain color is Dark Walnut with a satin poly.  I hope this beauty will help me conquer the toy clutter! 


Play table & chairs

I made this adorable play table & chairs for my sweet girl! The chairs only cost about $4 a piece! I tweeked the plan for the table top by using 1x6 that I had in my scrap pile. As well as for the table legs I used 1x2 instead of 2x2. The free build plans can be found on Ana-white.com!

Friday, June 6, 2014

Nursery name sign

I bought the letters from hobby lobby & painted them white! Next I cut the 3 pieces of wood to size! Painted & glued the letters to the wood. So easy & such a large statement piece in my daughters nursery! 

Bird house shelf

So I haven't posted anything in a long time because I had my daughter Blake! Here is the bird house shelf I made for her nursery. The build plan for the shelf can be found on Ana-white.com. This super easy & adorable build was so affordable! I found the bird houses for $1 a piece at a Joann's. I paint them navy & white & then glued them to the shelf! Such a cute addition to any nursery!

Saturday, April 27, 2013

Reclaimed wood - Queen size headboard


This is my first project that I designed myself! I had a general idea of the plan from one on Ana's site, but when I was trying to purchase reclaimed wood, the 1x6 @ 4ft were a better bang for my buck. The variation in the wood is just gorgeous, I'm obsessed! This project cost me about $120.

10 - 1x6 @ 4ft - cut to whatever size you choose
1x3 & 1x2 for supports & trim

For the finish I painted 2 of the panels with white spray paint & then distressed with my sander so some of the wood grain would show through. I stained 2 other panels with "sunbleached" see below. For the rest of the panels I left them in their natural beauty! The supports & trim pieces were brand new (whitewood), so I stained them with the "dark walnut".

Since I am an Army Wife & we move a lot I wanted to make sure that this piece of furniture would hold up to the beating it is going to get. In the pic to the left you can see where I placed my poket holes & that I placed the back supports in the same place that I placed the front trim pieces. When working with recliamed wood, don't force the wood to connect. Leave some of the gaps alone, you don't want to ruin the project & cause the wood to split even more.


For the legs I used a 1x3 & then attached a 1x2 on top of that with wood glue & counter-sunk screws. Fill in holes with wood filler! Put your horizontal trim pieces on the front, last. Measure each piece, because this wood was reclaimed & some pieces were split so the top & bottom pieces didn't end up being the same length.


Wednesday, April 17, 2013

DIY - Rustic Serving Tray

I made this easy project using a left over piece of 1x12 from another project! I decided to make it 18" long. For the sides I used 1x3. Measure each side & cut at 45 degrees off square. For added support, I attached the sides with PH screws from the bottom/underneath using my Kreg Jig & wood glue! To connect the 4 corners - I used wood glue & 1 1/4" finish nails.  Use your power sander to distress the paint if you like the way mine looks; I say - embrace the flaws in your wood! Last, add the poly/top coat with a foam brush for added durability.


Monday, April 15, 2013

Work Bench #2

My original work bench was my very first build; so it was not level. I must admit I had yet to purchase my counter-sinking drill bit & had not figured out how to use my Kreg Jig either! It is going to be used for storage now. I am proud to say build #2 is level! I would recommend changing the height of the legs to 30" for this plan to compensate for the height wheels. To see the build plans for this work bench click here or you can also search for it on Ana's website!


My compound miter saw is going to be so happy on the top of this baby, rolling smoothly around the garage! :)

 Happy Building!
~B

Thursday, April 4, 2013

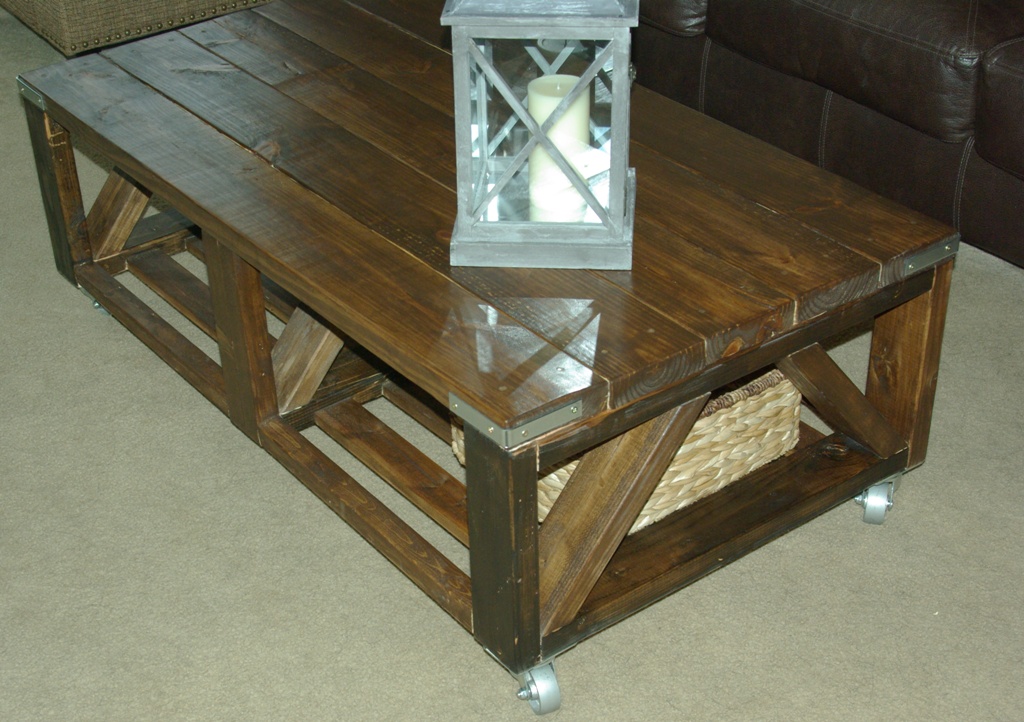
Triple Truss Coffee Table with Casters!

You too can turn this...

Into this:

For the plans on how to make this huge coffee table go to Ana White's site!
 I used my Kreg Jig to build this guy!


For the slats on the bottom measure from the end point of the 2x4 not the part where it is connected. I also drew little stars so I wouldn't get confused:


I would recommend sanding, staining & putting the poly on the base before attaching the top planks. There are a lot of angles that would be more difficult to get to if you wait until it is completely built.


For my casters: I chose these industrial beauties! They will rust though, so I would not use these if you are making this table for outside! My regular wood screws weren't wide enough for the casters holes, so I used my 1 1/4" PH screws to attach them to the bottom.


To see my brag on Ana's site click here!
Here are some more pictures! My stain color of choice: Dark Walnut. I added some industrial corner brackets to the top 4 corners as well! They match my wheels!


Thanks for stopping by!
B

Sunday, March 24, 2013

Rustic Bookcase

I'm finally finished with my best build yet! But FIRST, we must say goodbye to the partical board bookcase (piece of crap & lacked character) that used to be in our guest room. You were $40 - purchased from a big box store & never made me happy like my new handmade one does. You have been offically kicked to the curb! Sayonara!


Here is the beauty!


 Make sure you right down the places where you are going to put the shelf so they are even & match up. Use your speed square for straight lines!
 I used my Kreg Jig to build the box of the bookcase. It is such an amazing tool, that makes furniture building so much easier!

I used my Arrow Nail gun with 1 1/4" brad nails to attach the back boards & side trim. Use your wood glue too though for added strength!
I stained/oxidized & then put poly on all of the back planks before attaching them. For the oxidize mixture scroll down. The 3 stains I used are Sunbleached, Dark Walnut & Early American. I did 2 boards per color. For the back I used 8 - 1x4"s, instead of plywood.

Don't forget to give it a good sanding before putting the stain on! I chose Dark Walnut!


 Build plans from Ana White's Book The Handbuilt Home.


Monday, March 11, 2013

Don't stain, OXIDIZE!

To create the oxidize mixture fill a glass jar half way with white vinegar. Next, cut up very small pieces of Grade #0000 Steel wool (I found it at lowes, near the paint section) & add to vinegar jar. It will take 1 -2 weeks to begin to rust; shake it occasionally.
It should look like something this when its ready to be used:


Paint the mixture on your project with a foam brush. At first it won't look like anything is happening: Like this picture:


Give it an hour or so to soak in & then you will have a beautiful weathered look! See picture below the original color of the wood next to the oxidized piece. I used polyurethane to seal it. It brings out even more of a rich brown, which I love!

For more info on oxidizing wood & for low VOC finishes click: The Friendly Home